
This tutorial explains what is RepaintBoundary in Flutter and how to use it.
Flutter paints widgets to the screen. If the content of a widget should be updated, it will perform repaint. However, Flutter may also repaint other widgets whose content remain unchanged. It can affect the application performance and sometimes it's quite significant. If you are looking for a way to prevent unnecessary repaints, you can consider using RepaintBoundary.
Using RepaintBoundary
First, you need to know what is RepaintBoundary in Flutter. It's described as a widget that creates a separate display list for its child. According to Wikipedia, display list is a series of graphics commands that define an output image. Flutter suggests you to use RepaintBoundary if a subtree repaints at different times than its surrounding parts in order to improve performance.
Why Need to Use RepaintBoundary
Flutter widgets are associated to RenderObjects. A RenderObject has a method called paint which is used to perform painting. However, the paint method can be invoked even if the associated widget instances do not change. That's because Flutter may perform repaint to other RenderObjects in the same Layer if one of them is marked as dirty. When a RenderObject needs to be repainted via RenderObject.markNeedsPaint, it tells its nearest ancestor to repaint. The ancestor does the same thing to its ancestor, possibly until the root RenderObject. When a RenderObject's paint method is triggered, all of its descendant RenderObjects in the same layer will be repainted.
In some cases, when a RenderObject needs to be repainted, the other RenderObjects in the same layer do not need to be repainted because their rendered contents remain unchanged. In other words, it would be better if we could only repaint certain RenderObjects. Using RepaintBoundary can be very useful to limit the propagation of markNeedsPaint up the render tree and paintChild down the render tree. RepaintBoundary can decouple the ancestor render objects from the descendant render objects. Therefore, it's possible to repaint only the subtree whose content changes. The use of RepaintBoundary may significantly improve the application performance, especially if the subtree that doesn't need to be repainted requires extensive work for repainting.
For example, inspired by this StackOverflow Question, we are going to create a simple application where the background is painted using CustomPainter and there are 10,000 ovals drawn. There is also a cursor that moves following the last position the user touches the screen. Below is the code without RepaintBoundary.
  import 'package:flutter/material.dart';
  import 'package:flutter/rendering.dart';
  import 'dart:math';

  void main() {
    runApp(MyApp());
  }

  class MyApp extends StatelessWidget {

    @override
    Widget build(BuildContext context) {
      return MaterialApp(
        title: 'Woolha.com Flutter Tutorial',
        home: HomePage(),
      );
    }
  }

  class HomePage extends StatefulWidget {

    @override
    State createState() => new _HomePageState();
  }

  class _HomePageState extends State<HomePage> {

    final GlobalKey _paintKey = new GlobalKey();
    Offset _offset = Offset.zero;

    Widget _buildBackground() {
      return CustomPaint(
        painter: new MyExpensiveBackground(MediaQuery.of(context).size),
        isComplex: true,
        willChange: false,
      );
    }

    Widget _buildCursor() {
      return Listener(
        onPointerDown: _updateOffset,
        onPointerMove: _updateOffset,
        child: CustomPaint(
          key: _paintKey,
          painter: MyPointer(_offset),
          child: ConstrainedBox(
            constraints: BoxConstraints.expand(),
          ),
        ),
      );
    }

    @override
    Widget build(BuildContext context) {
      return Scaffold(
        appBar: AppBar(
          title: const Text('Woolha.com Flutter Tutorial'),
        ),
        body: Stack(
          fit: StackFit.expand,
          children: <Widget>[
            _buildBackground(),
            _buildCursor(),
          ],
        ),
      );
    }

    _updateOffset(PointerEvent event) {
      RenderBox? referenceBox = _paintKey.currentContext?.findRenderObject() as RenderBox;
      Offset offset = referenceBox.globalToLocal(event.position);
      setState(() {
        _offset = offset;
      });
    }
  }

  class MyExpensiveBackground extends CustomPainter {

    static const List<Color> colors = [
      Colors.red,
      Colors.green,
      Colors.blue,
      Colors.pink,
      Colors.purple,
      Colors.orange,
    ];

    Size _size;

    MyExpensiveBackground(this._size);

    @override
    void paint(Canvas canvas, Size size) {
      print('Running extensive painting');
      final Random rand = Random(12345);

      for (int i = 0; i < 10000; i++) {
        canvas.drawOval(
            Rect.fromCenter(
              center: Offset(
                rand.nextDouble() * _size.width - 100,
                rand.nextDouble() * _size.height,
              ),
              width: rand.nextDouble() * rand.nextInt(150) + 200,
              height: rand.nextDouble() * rand.nextInt(150) + 200,
            ),
            Paint()
              ..color = colors[rand.nextInt(colors.length)].withOpacity(0.3)
        );
      }
    }

    @override
    bool shouldRepaint(MyExpensiveBackground other) => false;
  }

  class MyPointer extends CustomPainter {

    final Offset _offset;

    MyPointer(this._offset);

    @override
    void paint(Canvas canvas, Size size) {
      canvas.drawCircle(
        _offset,
        10.0,
        new Paint()..color = Colors.black,
      );
    }

    @override
    bool shouldRepaint(MyPointer old) => old._offset != _offset;
  }
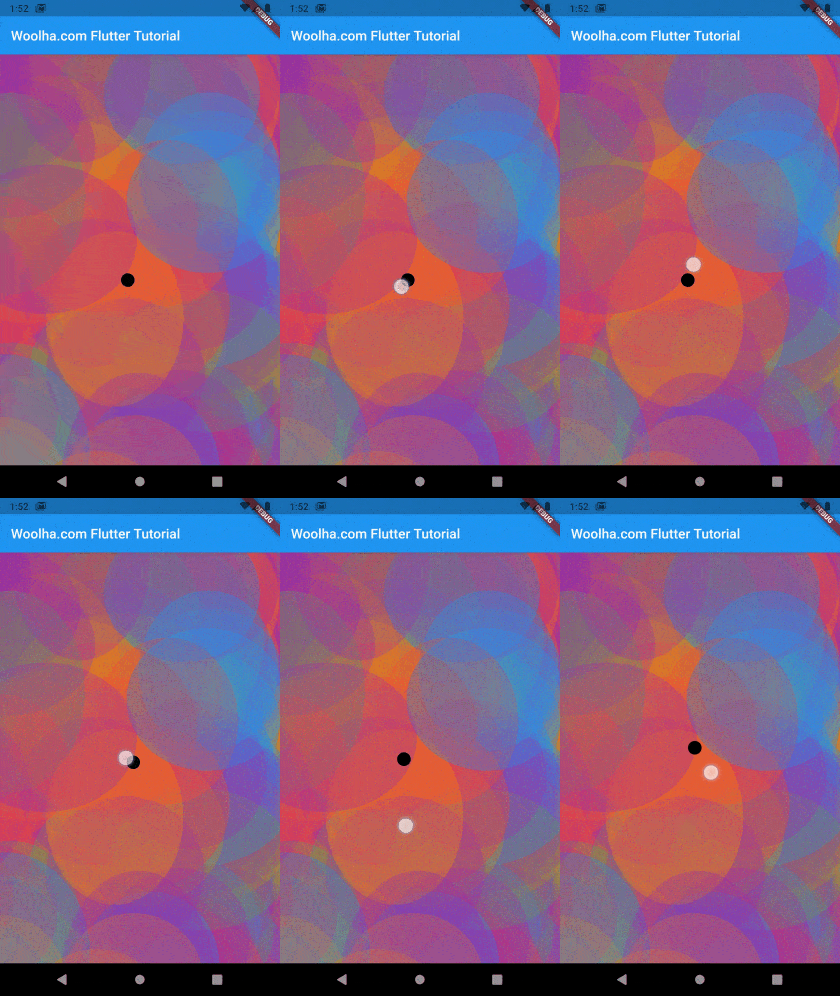
If you try to move the pointer on the screen, the application will be so laggy because it repaints the background too which requires expensive computation.
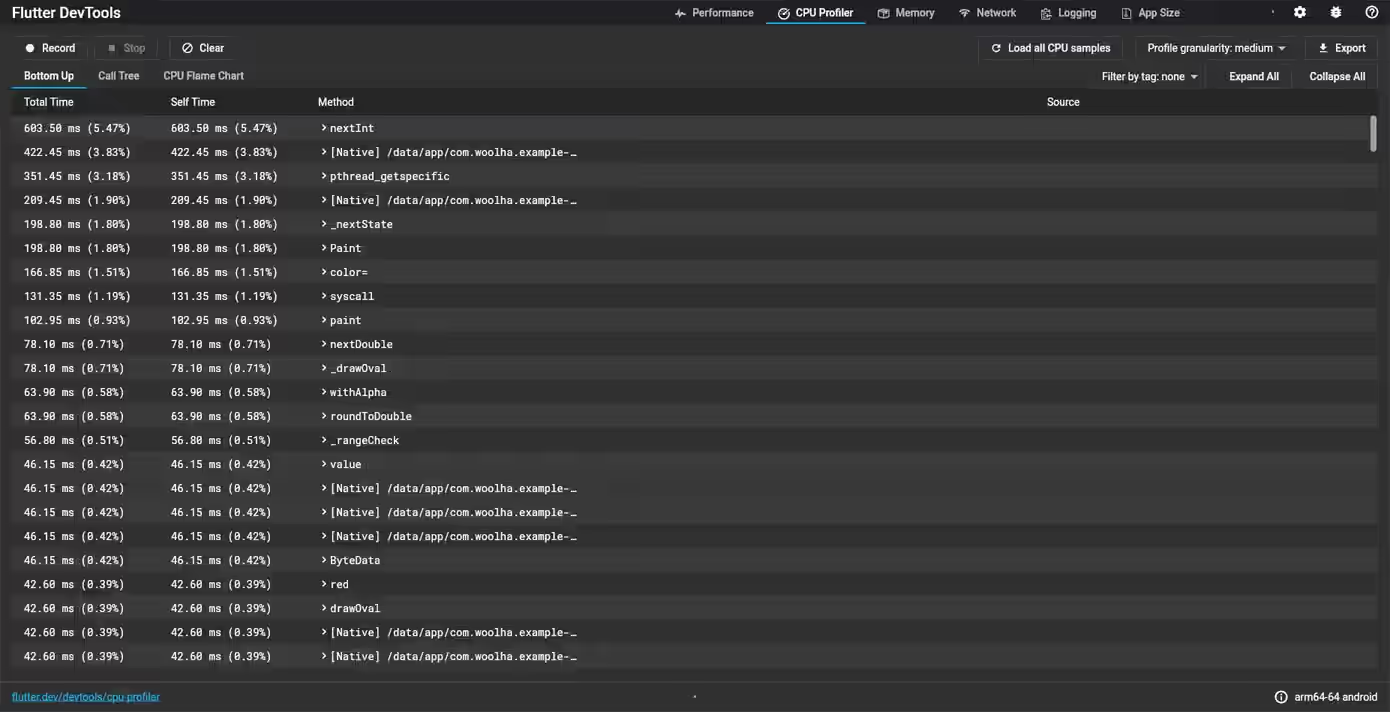
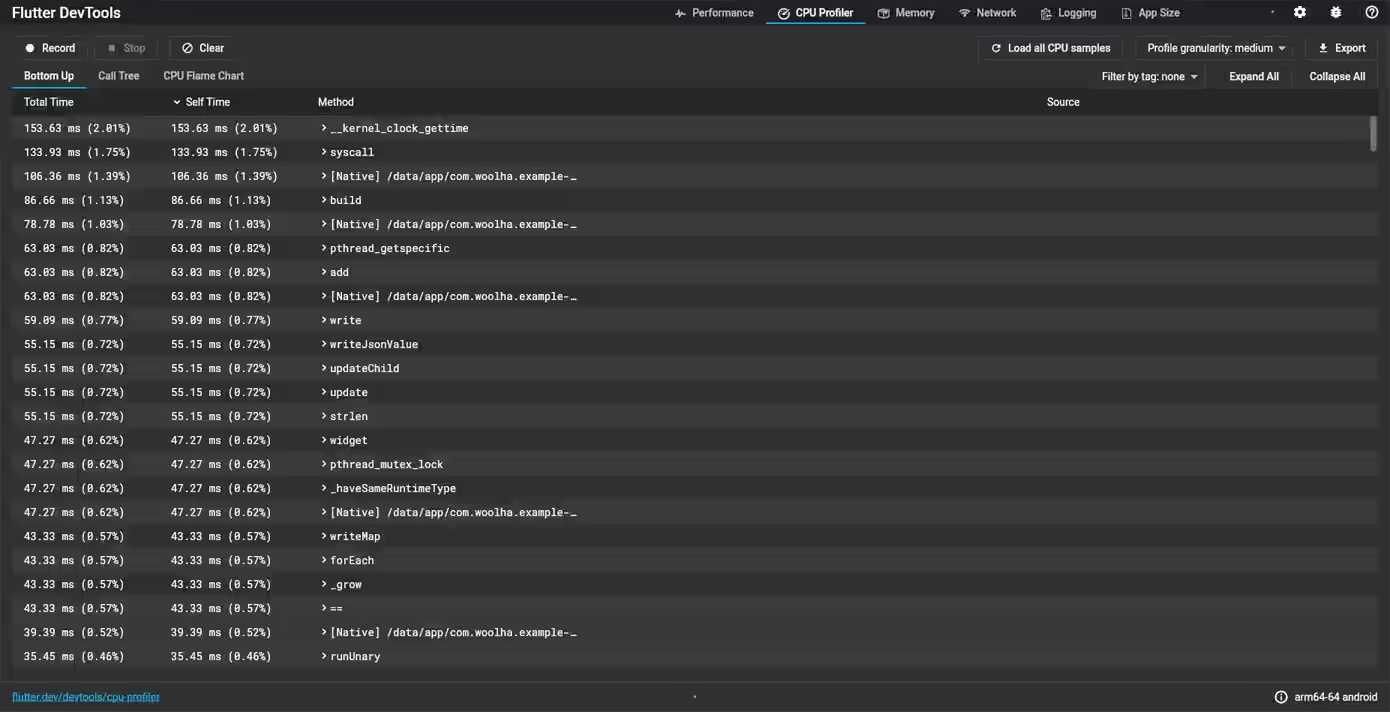
In order to know the cause of the bad performance, you can open Dart/Flutter Dev Tools. Select CPU Profiler and choose the Bottom Up tab. You can see the list of methods that take the most time. As you can see in the picture below, some of the methods on the top of the list are nextInt, paint, and nextDouble. That's because the paint method of MyExpensiveBackground is called every time the cursor moves to a new position.
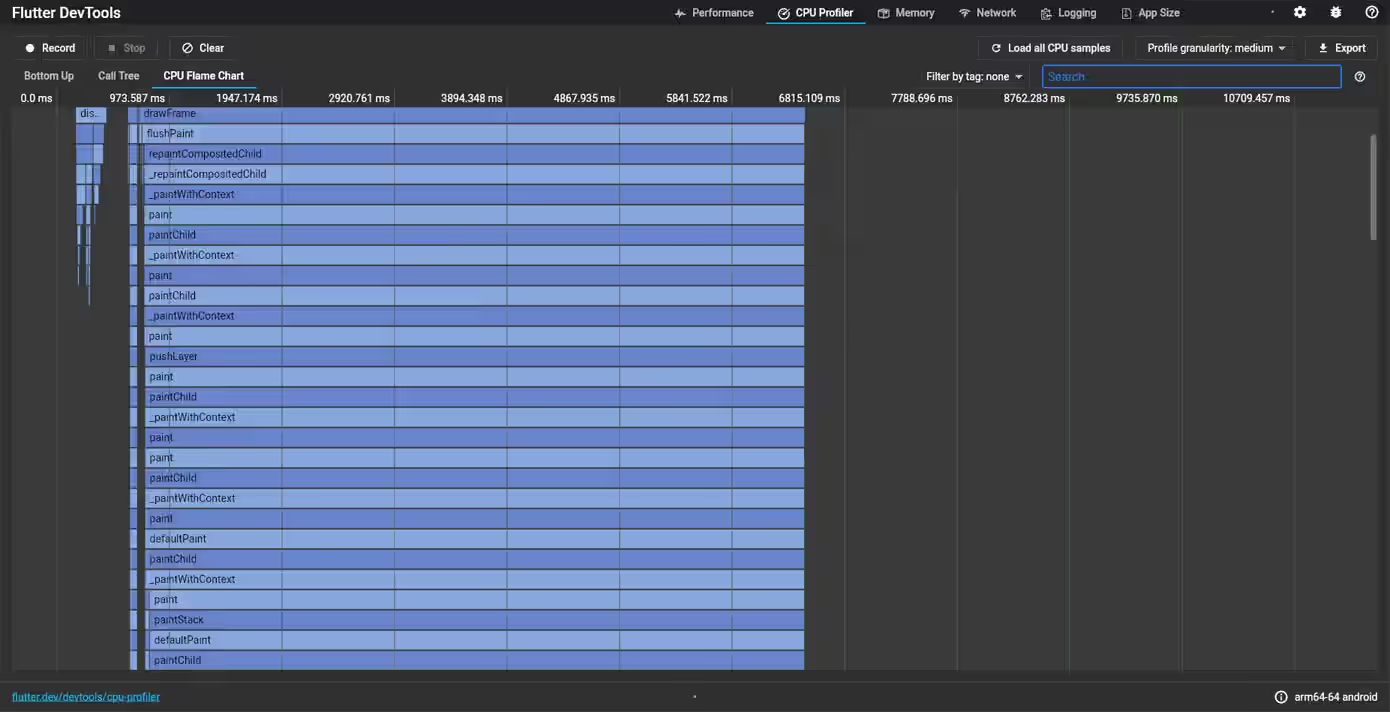
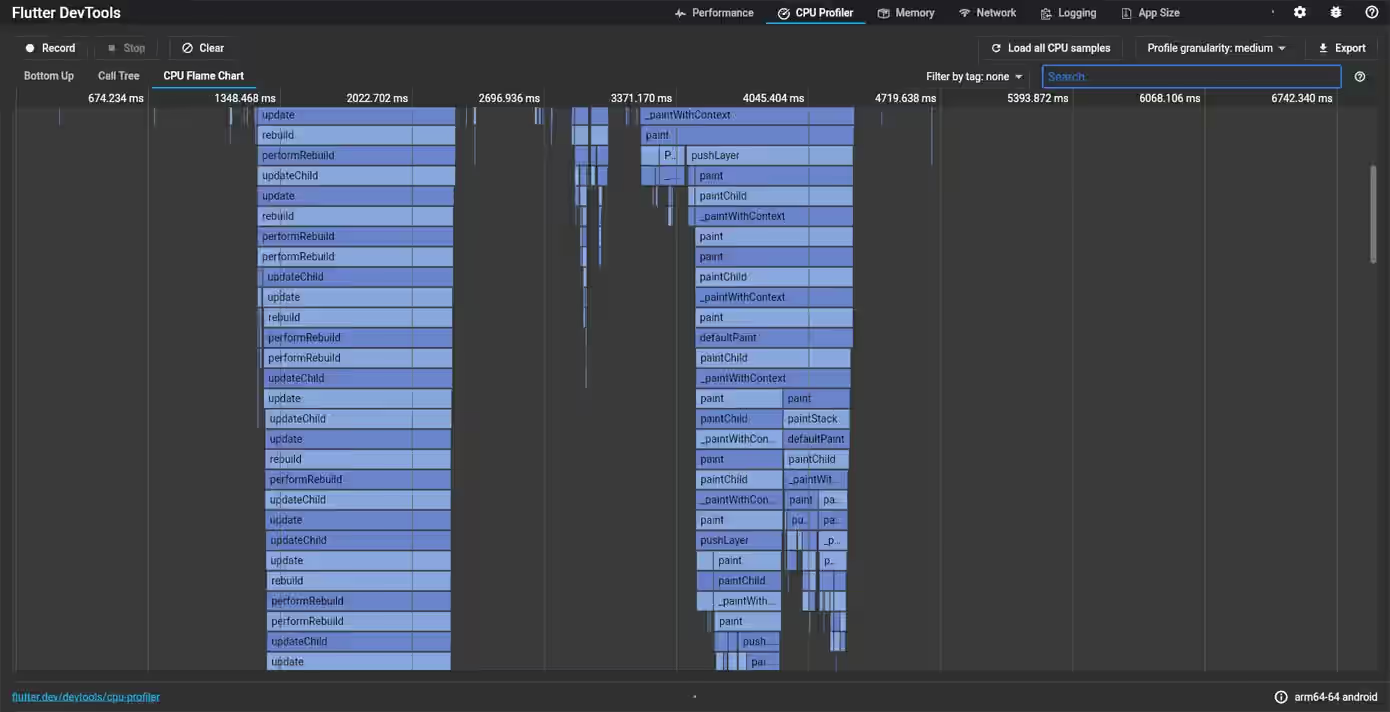
You can also open the CPU Flame Chart to see the called methods along with the execution time. There are a lot of calls to the paint method.
The solution for the above problem is wrapping the CustomPaint widget (that uses MyExpensiveBackground) as the child of a RepaintBoundary.
  Widget _buildBackground() {
    return RepaintBoundary(
      child: CustomPaint(
        painter: new MyExpensiveBackground(MediaQuery.of(context).size),
        isComplex: true,
        willChange: false,
      ),
    );
  }
With that simple change, now the background doesn't need to be repainted when Flutter repaints the cursor. The application should not be laggy anymore.
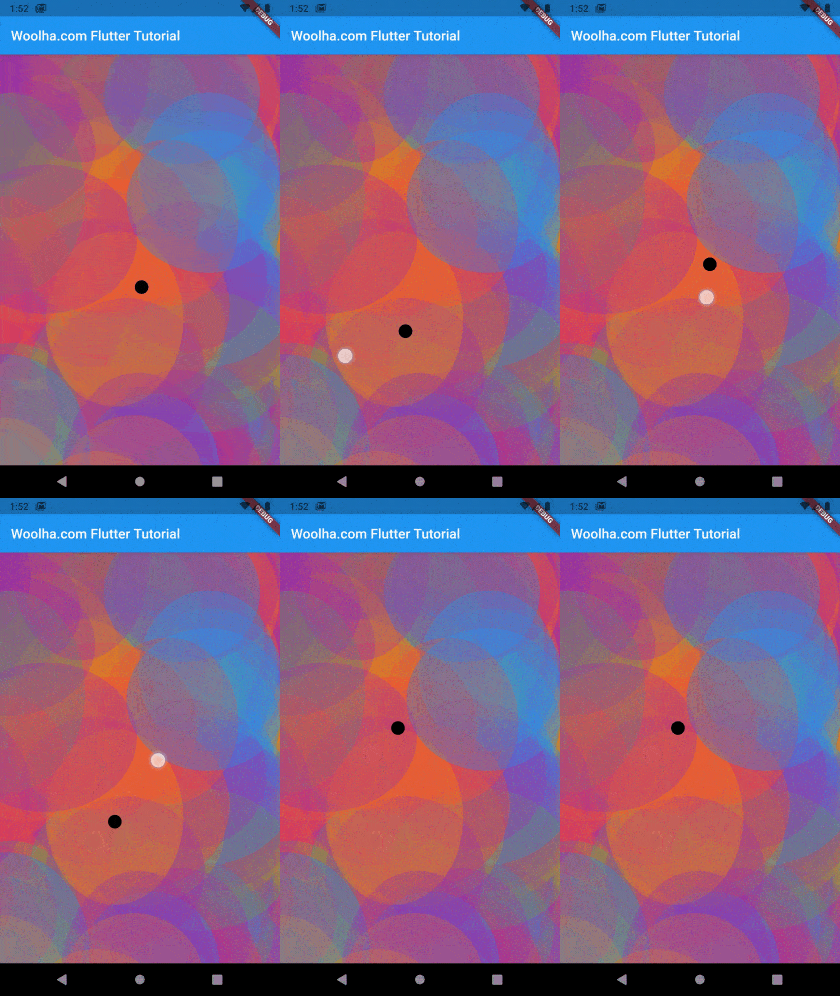
You can see the performance differences by looking at the Bottom Up and CPU Flame Chart tabs of CPU Profiler in the Dart/Flutter Dev Tools.
Debugging Repaint
Flutter provides a feature for debugging how the layout repaints. You can use it by clicking the RepaintRainbow in the Flutter Inspector, either from Android Studio or the Dart/Flutter Dev Tools. Alternatively, you can also enable it programmatically by setting debugRepaintRainbowEnabled to true.
  import 'package:flutter/rendering.dart';

  void main() {
    debugRepaintRainbowEnabled = true;

    runApp(MyApp());
  }
When a subtree of the render tree is repainted, you should see that the boxes surrounding the associated widgets are flickering. If there are some boxes not flickering, it means the subtree is not being repainted.
To give a better output, we are going to create another example. The layout consists of two parts: a container with a box that can be animated and a ListView.
  import 'package:flutter/material.dart';
  import 'package:flutter/rendering.dart';

  void main() {
    // debugPaintLayerBordersEnabled = true;
    debugRepaintRainbowEnabled = true;

    runApp(MyApp());
  }

  class MyApp extends StatelessWidget {

    @override
    Widget build(BuildContext context) {
      return MaterialApp(
        title: 'Woolha.com Flutter Tutorial',
        home: RepaintBoundaryExample(),
      );
    }
  }

  class RepaintBoundaryExample extends StatefulWidget {

    @override
    State createState() => new _RepaintBoundaryExampleState();
  }

  class _RepaintBoundaryExampleState extends State<RepaintBoundaryExample> {

    double _size = 50;

    Widget _buildListView() {
      return Expanded(
        child: ListView.builder(
          itemCount: 20,
          itemBuilder: (BuildContext context, int index){
            return Padding(
              padding: const EdgeInsets.all(8),
              child: Container(
                height: 50,
                color: Colors.teal,
                child: const Center(
                  child: const Text('Woolha.com'),
                ),
              ),
            );
            return ListTile(title : Text('Item $index'),);
          },
        ),
      );
    }

    Widget _buildAnimationBox() {
      return Container(
        color: Colors.pink,
        width: 200,
        height: 200,
        child: Column(
          children: [
            AnimatedContainer(
              duration: const Duration(seconds: 5),
              width: _size,
              height: _size,
              color: Colors.teal,
            ),
            OutlinedButton(
              child: const Text('Animate box'),
              onPressed: () {
                setState(() {
                  _size = _size == 50 ? 150 : 50;
                });
              },
            ),
          ],
        ),
      );
    }

    @override
    Widget build(BuildContext context) {
      return new Scaffold(
        appBar: AppBar(
          title: const Text('Woolha.com Flutter Tutorial'),
        ),
        body: Column(
          children: [
            _buildAnimationBox(),
            _buildListView(),
          ],
        ),
      );
    }
  }
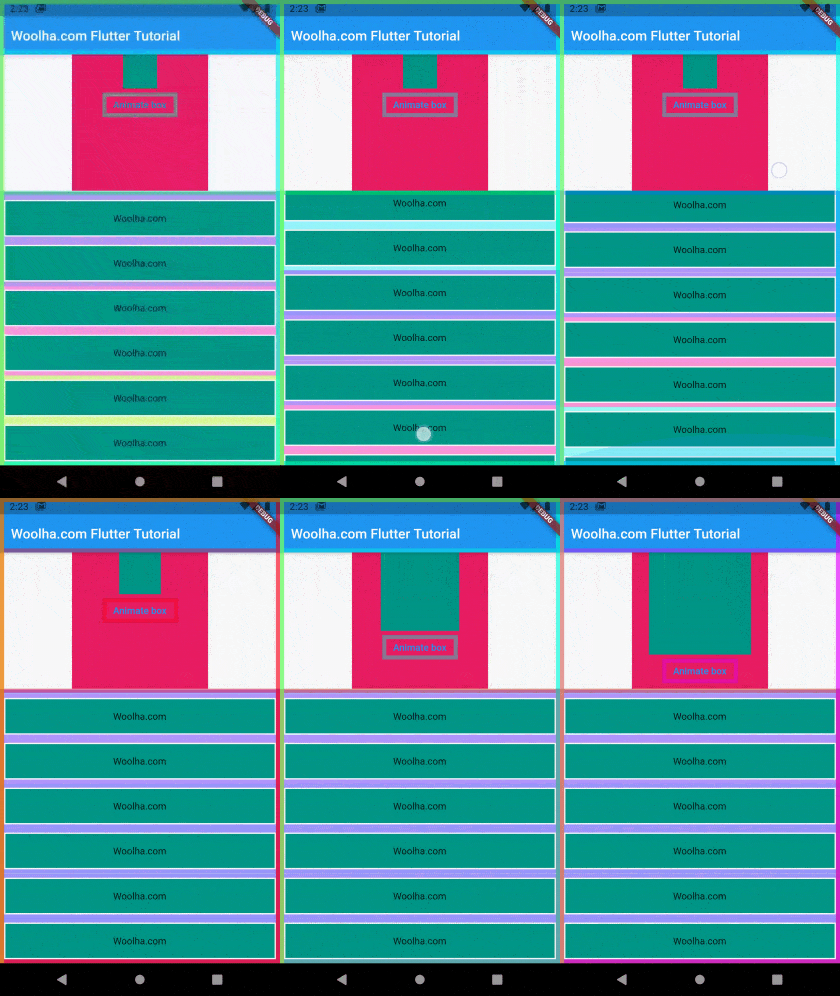
If the repaint rainbow is enabled, you will see that when the ListView is scrolled, the ListView's and its children boxes are flickering, but the boxes of the pink Container are not flickering. That's expected because the ListView has RepaintBoundary. On the other hand, if the box is being animated, you will see that only the boxes of the pink Container and its children are flickering.
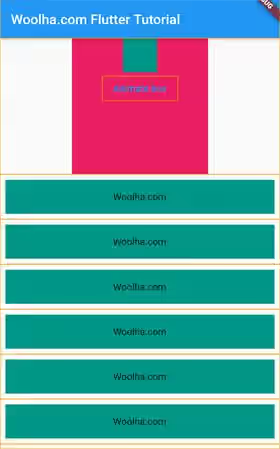
You can also try to enable debug paint layer borders. If you enable it, each layer will paint a box around its bounds.
  import 'package:flutter/rendering.dart';

  void main() {
    debugPaintLayerBordersEnabled = true;

    runApp(MyApp());
  }
Output:
Check Whether a RepaintBoundary is Useful
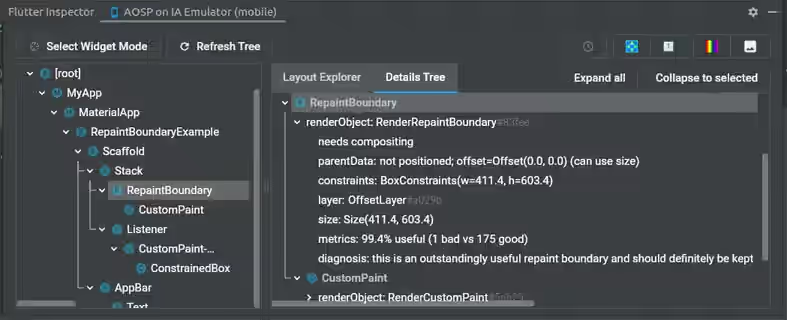
To check whether a RepaintBoundary is good for performance, you can open Flutter Inspector. On the widget tree, select the RepaintBoundary widget. Then, click the Details Tree tab on the right side. It will display the details of the selected widget. The RepaintBoundary has a renderObject property. When expanded, you can read the metrics and diagnosis properties. The metrics property shows the percentage of good usage, while the diagnosis shows the description which suggests whether you should keep the RepaintBoundary or not.
Summary
That's all for this tutorial. In general, you should use RepaintBoundary a subtree repaints at different times than its surrounding parts. To make sure that a RepaintBounary is useful, you can check it in the Details Tree and read the metrics and diagnosis.
