How to apply blur effect to any widget in Flutter? Find out in this tutorial.
Sometimes you need to apply a blurry frosted glass effect on your application. How can you create such an effect if you're using Flutter. A widget called BackdropFilter is suitable for that purpose. In this tutorial, I'm going to show you how to use that widget for creating a blur effect, which is also known as frosted glass effect.
Creating Blurry Frosted Glass Effect using BackdropFilter
BackdropFilter is a widget that applies a filter to the existing painted content and then paints its child widget. Flutter will apply the filter to all areas within its parent widget's clip. That means if there's no clip, the filter will be applied to the entire screen.
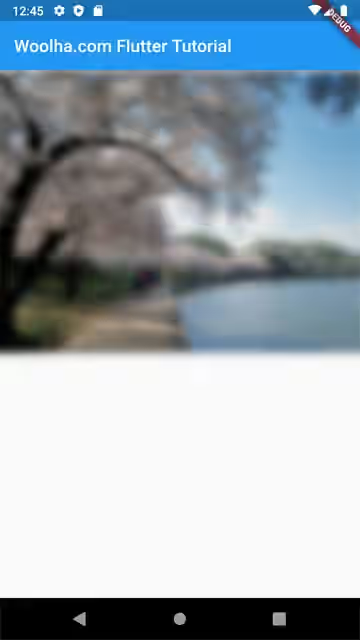
For the first example, we are going to create a blur effect that will be applied on the entire area of the parent widget. As BackdropFilter applies the filter to the existing painted content, usually we need to use Stack widget for the implementation. The widget where the filter will be applied on must be placed before the filter.
Since the filter should cover the entire area of its parent, we need to wrap the BackdropFilter widget as the child of Positioned.fill. Here's the constructor of the BackdropFilter
  const BackdropFilter({
    Key key,
    @required this.filter,
    Widget child,
  })
You are required to pass an ImageFilter. In this case, the most suitable filter can be created using ImageFilter.blur
ImageFilter.blur({ double sigmaX = 0.0, double sigmaY = 0.0 })sigmaX and sigmaY control the deviation standard based on the gaussian filter on x-axis and y-axis respectively. Both have defaults value of 0, which means no effect is applied. To apply the filter on x-axis, change the value of sigmaX to a positive number. For the y-axis, use the sigmaY property.
The child of BackdropFilter can be a Container whose color opacity is below 1, with 0 is a common value.
  Stack(
    children: <Widget>[
      Image.network("https://tile.loc.gov/image-services/iiif/service:pnp:highsm:13600:13696/full/pct:12.5/0/default.avif"),
      Positioned.fill(
        child: BackdropFilter(
          filter: ImageFilter.blur(sigmaX: 5, sigmaY: 5),
          child: Container(
            color: Colors.black.withOpacity(0),
          ),
        ),
      ),
    ],
  )
Output:

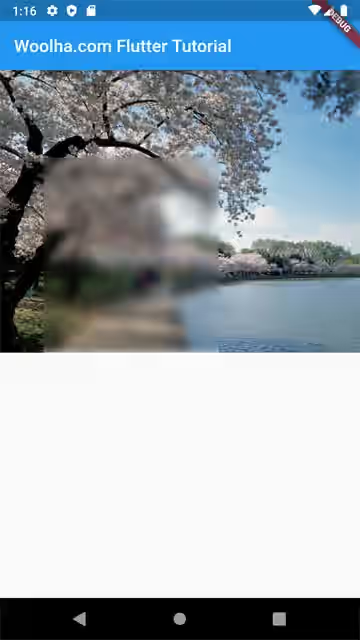
The next example is how to make the filter applied on a certain area of the image. Instead of Positioned.fill, use the default constructor of Positioned widget by which you can set the distance from top, left, bottom, and right. However, that's not enough. As I've written above, Flutter will apply the filter to all areas within its parent widget's clip. Therefore, in order to apply the filter on a certain area, you need to wrap the BackdropFilter as the child of any Clip widget, such as ClipRect, ClipRRect, ClipOval, ClipPath, or CustomClipper.
  Stack(
    children: <Widget>[
      Image.network(
        'https://tile.loc.gov/image-services/iiif/service:pnp:highsm:13600:13696/full/pct:12.5/0/default.jpg',
      ),
      Positioned(
        top: 100,
        left: 50,
        width: 200,
        height: 250,
        child: ClipRect(
          child: BackdropFilter(
            filter: ImageFilter.blur(sigmaX: 5, sigmaY: 5),
            child: Container(
              color: Colors.black.withOpacity(0),
            ),
          ),
        ),
      )
    ],
  )
Output:

Properties
Here's the list of properties of FilterChip you can pass to the constructor.
Key key: The widget key, used to control if it should be replaced.ImageFilter filter*: The image filter to apply to the existing painted content before painting the child.Widget child: The widget below this widget in the tree.
*: required
